Chic on a Shoestring Decorating: May 2011


This blog contains affiliate links. If you click one and make a purchase, I may make a commission at no additional cost to you. Read more here.

Beer Can Chicken

My hubs, Mr. Chic, is quite the grill master.  Just one of the many reasons why I love him. :)  He has been wanting to make a beer-can-chicken for years but for some reason, he never has.  Probably because his grocery shopper aka, me, never buys a full chicken at the grocery store.  I always come home with the boneless, skinless frozen kind. 

We decided that the long holiday weekend would be the perfect time to try out the much hyped (at least on the Food Network grilling shows) beer-can-chicken.  We were not disappointed. :)

Apparently, there are many versions of the beer-can-chicken (I thought you just opened a beer, stuck a chicken on it and grilled it- this is why I don't grill at our house).  

Mr. Chic chose a recipe he saw on the Food Network show Grill It with Bobby Flay.  This recipe was from his guest host, Robin Koury.... hence the name: Robin Koury's Spice of Life Beer Can Chicken.  (Recipe at end of post)

To get started assemble your ingredients to make the rub.


The recipe calls for a  4 pound chicken... I got a Tyson 4.5lb. for under $5 at Wal-Mart.  Open and rinse the chicken. 

This is where I would bust out the disposable rubber gloves, (I have an unhealthy paranoia that I can never get the dead chicken juices out from under my fingernails and will give myself salmonella poisoning while eating potato chips while the chicken cooks).  Mr. Chic does not share in my paranoia.


Pat the chicken dry and then cover in the rub spices making sure to get in the cavity, under the skin and on the skin.


Mr. Chic received a fancy beer-can-chicken contraption (below) from my parents for Christmas but really, you just need a beer can and a cookie sheet.


Add the appropriate spices to the beer and put the chicken on the can like so...


Spray down the counter tops with lots of sanitizing cleaner to kill the gross raw chicken juices.

Since you will cooking the chicken with indirect heat, put it on the side opposite the burners you're using.


Cook for about 1 hour 20 minutes or until the internal temperature of the chicken is 155 degrees.

When it's finished drizzle with a tablespoon of honey...


The finished beer-can-chicken... doesn't it look deelish?!


It was delicious and super moist!  The only disappointment was that the  flavor of the spices didn't really permeate through the chicken, just the skin.  However, we dipped the chicken in some homemade BBQ sauce (Mr. Chic didn't write down the ingredients!)  and it was really fantastic.  Definitely great for the first time making it, we'll do it again and tweak the recipe just a bit. 


Robin Koury's Spice of Life Beer Can Chicken

Recipe courtesy Robin Koury
Prep Time:10 min Inactive Prep Time:2 hr 0 min Cook Time:1 hr 30 min Level:

Serves:
4 to 6 servings.Ingredients

4 pound chicken
1/4 cup paprika
2 tablespoons brown sugar
1 teaspoon kosher salt
1 heaping teaspoon cayenne pepper
1 teaspoon onion powder
1 teaspoon garlic salt
1 teaspoon chili powder
2 tablespoons butter, melted
1/2 can beer (recommended Sam Adams White Ale)
3 cups apple wood smoking chips
1 disposable aluminum pie plate (or drip pan)
1 tablespoon honey

Directions

Soak the wood chips in water for at least 2 hours.

When ready to grill, preheat 1 of the burners to 350 degrees F.

Make sure the chicken is clean and innards are removed; pat dry with a paper towel and set aside. In a small mixing bowl, add paprika, brown sugar, kosher salt, cayenne pepper, onion powder, garlic salt, chili powder and mix well. Take the chicken and separate the skin from the breast taking care not to tear or remove skin. Apply the spice rub directly to the chicken breast, under the skin. Apply rub to the entire chicken, inside and out, reserving at least 2 tablespoons. Punch 2 holes at the top of the can, with a manual hand-held can opener. In a new bowl, mix butter and remaining spice rub. Add this mixture to the half-full can of beer. Place chicken over beer can and insert into the cavity of the chicken, keeping beer can standing up.

Place the wood chips in a foil smoker pouch over the active burner on the grill and set the chicken, on a pie plate, over the in-active burner. Close the lid. Rotate the chicken every 20 minutes. 5 minutes before cooking is complete, drizzle the honey over the chicken. The chicken should take about 1 hour and 20 minutes to cook, or until an instant-read thermometer registers 155 degrees F. Slice and serve.

Flaunt it Friday #57

Welcome back to Flaunt it Friday!  To give more individual exposure to my Flaunt it Friday picks I've decided to list them as individual posts on my new blog The Besties

The Besties will dedicate an entire post to your featured link up and of course give all credit to you and link back to your blog.  If you are featured you may add either or both an "I was featured" button from Chic on a Shoestring Decorating and/or The Besties

Chic on a Shoestring Decorating

Can't wait to see what you've got!


Interior Decorating, Client Family Room Makeover

Hi friends, as some of you may recall I started an interior decorating business a while back.  To my surprise, people are actually hiring me! ;)  I've had several jobs and I am so loving it!  It was what I was meant to do (besides being a mommy). 

I thought I could share some before and after shots with you.  As someone decorating on a budget, I find it helpful to see creative ways other's decorate on limited funds. 

This was my first paying job.  Although I didn't make much money at all, I was just so excited for someone to actually hire me that I didn't care. 

This client was on a very limited budget, her main concern was new window treatments. 

Here is a before shot of her family room...


She was willing to do some work to save money and improve her decor.  I suggested that she spray paint her curtain rods to Oil Rubbed Bronze.  I also suggested that she make pillow covers for the throw pillows that came with the couch and love seat.  (sorry the picture quality isn't great)

The after:


AFTER

I was able to get them a brand new very inexpensive coffee and end table set that really helped modernize the room.


I also suggested she spray paint the mirror above the fireplace frame Oil Rubbed Bronze.

AFTER


Dark brown pillow was purchased, larger pillow was reused and recovered
The coffee table centerpiece is missing!

This makeover was completed for around $350 and it included:

New coffee table and 2 new end tables  (Furniture Row, Sofa Mart)
4 new curtain panels (K Mart, yes... K Mart)
2 lamps and shades, several decorative throw pillows, Fireplace mantel decor (excluding mirror) and
misc. decorative accessories (TJ Maxx, Tuesday Mornings, etc.)

As alway, thanks for stopping by.  If you haven't done so already, please stop by my new blog The Besties, featuring the best posts from newer bloggers and Flaunt it Friday. :)

Master Bedroom Makeover Inspiration

Do you have a room in your house that just won't come together (or is this just me being ocd decorating girl)?  My master bedroom hasn't been quite right since we moved to our current house almost 2 years ago.

I finally figured out what was wrong... my furniture and my decor don't flow.  I have Louis Philippe style furniture (which I'm so over) and my decor was a little too modern for it... I know it's ok to mix styles but this just wasn't working.  I have some cute pillows and some cute items but it just wasn't coming together. 

I had been doing some research for inspiration and found a ton of stuff I loved but I don't want to spend a whole lot (no new furniture, re-use a lot of stuff I already have).  I also was trying to avoid painting because we have a vaulted ceiling which makes it very hard to do a quick re-paint.

I finally found something I could do with minimal cost and no re-painting.  Guess who it came from?!

Design goddess/decorating genius Candice Olson. 

I LOVE her.  I have never seen her do anything bad, even if it's not my taste, it always looks great.

She is the only designer on HGTV that I would hand over the keys to my house and say "go crazy" and not worry one bit.  There are other great designers on HGTV but she is my fave by far.

Anywho, I came across an episode of her new show Candice Tells All (which is kind of exactly the same as her old show Divine Design but whatever) where she did a master bedroom makeover in neutrals and it turned out FABULOUS. 

I know, neutrals??  Booooring... snooze.

But no, really, this is just lovely. 

My pictures of this room are not lovely, they are from the TV!   I couldn't find this episode on-line, I was forced to take pictures of my paused TV screen, probably the biggest blogging no-no ever.

But do you want to see it or not?! 

I thought you'd say yes.

So, here it goes...


Ok, so those pictures are really bad and the coloring is really off but you get the idea, right?!  I hope!!

Lovely creams and whites and taupes and tans all blending quite nicely.

My room re-do won't be this fantabulous because I won't be spending tens of thousands of dollars but I have a little bit of fun stuff up my sleeve.  I'm going to be adding a little paint in my room but not on the vaulted ceiling part... with it I will be doing a fun giveaway so come back soon to check on my progress.

Don't forget to check out my new blog The Besties featuring the best of you! :)

Check out The Besties First Feature!

Please head over to my new blog The Besties to check out the very first feature.  And be sure follow The Besties so you can come back often to check out all the new talented bloggers! 


The Besties is Here! (and so is Flaunt it Friday!)

Hey friends! I have a super fun and exciting announcement to make!

No, I am not expecting a baby.

No, I am not starting an Etsy store.

No, I am not being featured on the Nate Berkus show.

Yes, I am launching another blog (but you already knew that) but you didn't know that it will feature you and all of your awesome creativity and thriftyness!

(Yes, I am going to continue this blog , Chic on a Shoestring Decorating, as usual so stop panicking.) 

This new blog will be "The Besties", as in, "the best stuff" (not your bff) of you fine folks' blogs.  It will not be specific to one category, just like Flaunt it Friday.  You can submit posts about decor, crafts, recipes, thrifty finds, DIY, helpful hints, whatever you're proud of!

I am launching The Besties in the hopes of giving newer bloggers some big exposure by featuring them (and no one else!) in a post.

That is the best thing about The Besties, each post will only feature one person and their project only... kinda like being the star of the day back in gradeschool... it's all about you!

I'm hoping The Besties will give the newer blogger a big shot of exposure when one of their best posts is featured here.

But no fear to you long-time bloggers, The Besties is an equal opportunity blog, old-timers will be featured too. Anyone who's got a really great post can be featured on The Besties. :)

Another reason for starting The Besties is that I have been overwhelmed by the great appreciation and gratitude that my blog friends give me when I feature them in my Flaunt it Friday Features. I mean, they are downright excited and thankful (you guys aren't faking it, are you?!) They use words like "honored" and "appreciate" and "Woo Hoo!!". They even give me shout-outs on their blog for featuring them! (That is really nice!)


So, with all this great feedback, I've been feeling there has to be a way to highlight more of your handywork than I can feature each week in my Flaunt it Friday Features post.

Especially those newer bloggers that are really making and doing spectacular things but no one sees it because their only followers are their mom, husband (who doesn't even read it!), and Aunt Gertrude. (Not that those fine family members don't count). But, you get the idea.

Now that Flaunt it Friday is consistently reaching into the 300 links it is difficult for me to go through E V E R Y S I N G L E link. I know I am missing some awesome stuff.

The Besties will allow you to send your awesome link directly to me (I'm hoping that I don't get 300 a day... actually, that would be awesome! ) You will then be considered for a feature post at The Besties!
I hope to eventually have a large directory where people can come and look at all of the fabulous posts for inspiration and ideas in certain categories that they are interested in.  How cool would that be?!?

But, I can't do it without your help.

First, please, please, please go here to The Besties and become a follower.  You can "like" it on Facebook too because that's what all the cool kids do.

Then, start submitting your best projects to thebesties @ hotmail{dot}com

Yay!!!  I can't wait to see all the kinds of awesomeness I will be receiving in my inbox and I'm even more excited to feature you!!

Link up your Flaunt it Friday posts... they are eligible for being featured on The Besties!


Want to be Featured??

Hello, peeps. Sorry I haven't been churning out very many creative and inspiring blog posts for you over the past couple weeks. I have been dealing with this... 

*Warning, if you're easily grossed out by injuries look away!!


OUCH!!


No, that is not my broken hairy leg and foot... it is my poor hubby's.  A bad sprained ankle AND a broken foot.  Total BUMMER way to start spring!

Since it is his right foot he can not drive.  I am now the official chauffer/serveant and feel a bit like I have a third child. 

That's awesome. 

Awesomely bad.
But, I do feel very sorry for the hubs because that injury hurt like the dickens.  Plus, he hates being laid up, especially at this time of the year.  It is keeping him from his favorite hobby, fiddling in the yard (which includes, mowing very straight lines on the plush finely kept grass, killing errant dandelions, watering our garden, flowers and grass... yes, we're the people with green grass even in the grass frying late summer heat of the midwest, and re-doing the backyard landscaping, just to name a few). 

It also means I have to do a lot of these things now since he can't... with all my spare time it sounds like a good time to launch a new blog, right!?  Ummm, NO!

But I am doing it anyway- this Thursday, May 20, along with my Flaunt it Friday party!  I've been working hard on it and I'm way excited!! 

But, I need some help from you guys...  I need your best post!  If you'd like to be featured on my new blog please send a link to your best post to kateluvs2decorate {at} g mail {dot} com.  Except all one word and no parenthesis and symbols for at and dot  :) 

Please send it to me with "Featured" in the title of your email. 

I'll be explaining more soon!!  SO EXCITED!!!

Flaunt it Friday #56

Hi, friends!!  So sorry for the late party but Blogger was having some major technical difficulties and was in "read only" mode for about the last 18 hours. 

Anywho, we won't let a late start ruin our party... link 'em up!! :)

Chic on a Shoestring Decorating


Flower Power


Hello there friends!  I hope all of my fellow moms had a wonderful Mother's Day.   It was a beautiful day here and I was able to spend much of the day outside with my family.

Mother's day is one of my favorite times of the year, not only because it's a special day for me and my boys but also because in these parts it signals the start of the gardening season.  Any earlier and you risk your crop being killed by a late spring frost (major bummer!).


I love planting our annual flower baskets and so does my husband.  He is a "yard guy"... you know, one of those guys that mows perfect straight lines in the yard, trims and edges with every mow, not one blade of grass out of place, and absolutely NO dandelions (heaven forbid!)  

I love this about him because our yard always looks great and I never have to mow, ever.   I have never mowed the grass in the 10 years we've been married, not even once.  I tell him we were meant to be together because he is the outside decorator and I am the inside decorator, we make a good team.  :)


We don't ever cross into each other's territory until annual flower planting season. This is where I cross the line... this is risky business for me because I don't want him to come in the house and tell me how I should decorate.  Thankfully, he doesn't give a rip.


He graciously shares the annual basket planting duties with me. Heading to the nursery around Mother's Day is one of our favorite things to do each year. We don't tell each other what plants to get but we do try to coordinate colors. This year we decided on shades of pink... how romantic. :)


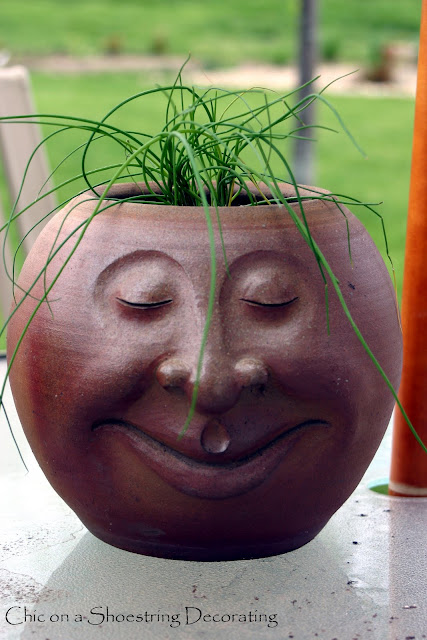
Every spring we also decide together what kind of hair-do Butch should have for the summer.  Butch was a wedding present from an eclectic older lady.  He was not on our registry and we had a good laugh when we unwrapped him.  He came with a lid that looked a little like a hat, I thought he was a cookie jar.  I decided that he didn't really go with my kitchen so thought he'd end up in a garage sale.

I was pleasantly surprised when my clever husband filled up the cookie jar with dirt and planted grass seed in it.  He kept the grassy hair-do nicely trimmed which led to the name "Butch".   Butch has since had many hairstyles and colors... curly hair, long hair, flowery hair, and now edible hair.  This year he's sporting some chives which will be delicious in our baked potatos.


We also planted a vegetable garden and can hardly wait for those home-grown tomatos! 

I plan on sharing the progress of our flowers and garden over the summer.  Hopefully I won't kill anything.

Have you done your spring planting??

Flaunt it Friday #56

Hello, party people!!  Link up your best, I can't wait to see it!  


Chic on a Shoestring Decorating


PS:
Bloggy Blog Designz is having a Giveaway!!! They are giving away all kinds of goodies. Plus ALL entrants will receive 20% off any purchase through the end of the month! Be sure to check out their website for more information, or to enter yourself. Take a look at their portfolio and packages to see what's right for you.
The first 5 entrants will receive a $15 giftcard. The giveaway will close on May 08, so be sure to have your posts done and comments left by midnight! Good Luck to everyone!

Flaunt it Friday Features

After a hectic week I'm finally getting last weeks Flaunt it Friday Features posted.  It was so hard to choose!  Make sure to come back late Thursday night for this weeks party.  Thanks for joining me!

Feel free to grab a button if you were featured.


Chic on a Shoestring Decorating


Check out this pretty desk makeover by Kreative Knack.


Creative and cute T-shirt turned pillow by Primp.


Awesome DIY floor cloth by Design Share... love the design on this one!


Fabulous antique hutch refinish by Recaptured Charm.

[early 20th century  hutch 010a[8].jpg]

Check out these drool worthy Boston Cream Cupcakes from Heck Fridays. 

Cute clock makeover by West Furniture Revival, check out the cute metal wire she used over the bottom half.


Can you say Yum?  Delicious Lobster Bisque by Food, Wine & Modge Podge.


Cute laundry room makeover by Love of Family & Home.


Lovely cushion makeover by The Painted Hive.


Chair (3)
 Fantastic DIY kitchen makeover on a budget by The Dixon Dialogue.


Are ugly lamps bringing your room down??

I like lamps. 

They are so much more important than people give them credit for.  They are not merely for putting out light, they are also an important decorative accessory. 

A lamp and it's shape, color, size, shade and placement can make or break a room.

The biggest lamp faux pas I see over and over again is a too small lamp for the space or a lamp with too small of a shade for the base.  These lamp faux pas drives me nuts!

This shade is way too small for this lamp... but the crookedness and the big dent adds a nice touch.

Picture from Before & After ugly lamp contest


One of my design rules that should be common sense is that a lamp should never be in the shape of a person or persons...

I like to call this the "Brokeback Mountain" lamp. 

Picture from Before & After ugly lamp contest


Seriously?!  That is an actual lamp!  That ugly thing would definitely break the beauty of any room.
There are so many options out there to buy or re-make an inexpensive lamp that no one should have to live with either of those ugly things.

The thrift shops are full of old, cool shaped lamps that are just needing a can of spray paint and a new shade.

Check out these bad boys from the ugly lamp contest... I'm seeing them in a lovely shade of green apple...

Picture from Before & After ugly lamp contest

Wal-Mart has really improved their line of lamp bases with mix and match shades.  Most average size lamps are around 18.99 with around a $14.99 shade.  Target has a great selection too but come in a little pricier than Wal-Mart. 

TJ Maxx/Homegoods/Marshalls are great places to find unique and higher-end lamps for great prices.  Anywhere from $9.99 for small ones and larger ones are about $29 to $39. 

Since I like lamps so much and they are such an important design aspect of a room I get a little bent out of shape if my lamps don't look right. 

My family room lamps had been bugging me for a while...

I had some nice brushed silver bases that I bought at Wal-Mart several years ago.


They were fine but they were just missing something...

I decided that I didn't mind the base but the shade was BOOOOORRRRIIIIIIINNNNNNGGGGGG.... snooze.

I went "grocery" shopping at Wal-Mart and picked up a new lamp shade. 


This was a little more exciting but it was a little more formal than what I had in mind.  I ended up exchanging it for a drum shade (it wasn't there the first time I went or I would've bought it first!)


Much better!!  And, if you're still awake, you may have noticed this lamp is sitting on a different table.  I moved the set to my husband's man cave because I found some sweet lamps for a sweet deal for our family room!


These pictures just don't do these pretty lamps justice.  I might have to take some more tomorrow with better lighting.  The best part is that these shiny, lovely, sleek lamps were on clearance at Gordman's for $24 each AND they were 50% the clearance price.  I got them for $12 each!!! 

Woot, Woot!  You friends know how I love a sweet deal and this was a suh-weeet one! 

I love the sophisticated new look they add to my family room.  They are very Z-Gallery-esque and I'm loving it! 

Do you have any lamp faux pas in your house?  If so, you can fix it on the cheap... get going to Goodwill, no one deserves to live with bad lamps.


Linking:  Fireflies & Jellybeans

My faves...

09 10 ""